Skip to content
Portafilter Co

Machines · Espresso Machines

The best espresso setup under $200

Two hundred dollars buys two things, not six. Here is the pairing that works, the cheaper route that works better, and the parts to add the moment you can.

By Stephen V.Updated How we pick
#ad

We earn a commission when you buy through our Amazon links, at no extra cost to you. It never changes a verdict, and we say so when the cheaper product is the better buy. How this works.

If two hundred dollars is the whole budget, buy the CASABREWS 3700 Essential and a Timemore Chestnut C3 ESP hand grinder. That pairing takes essentially the entire budget, and it is for the person who wants a counter machine with a steam wand and is willing to grind by hand. If you would rather spend less and get a better shot, the Wacaco Nanopresso is the budget route — a hand-pumped brewer that reaches real espresso pressure for well under half the money, which leaves room for the two cheap parts at the bottom of this page that fix the faults everything in this band suffers from.

The uncomfortable truth about this budget is that it does not stretch to a kit. Our best espresso setup under $500 page buys a machine, a grinder, a precision basket, a calibrated tamper, a distribution tool and a scale, and it does so because $500 genuinely covers six items. At $200 you are choosing between a machine-plus-grinder with nothing left over, or a cheaper brewer with three small items. Any page that claims otherwise is quoting prices that have not existed for several years. The live prices in the table below are the authority here; the split moves with the market, so treat the table rather than any sentence in this paragraph as the arithmetic.

Why the grinder takes half of a $200 budget. It is the same reason it takes a fifth of a $500 one: espresso is ground coffee packed into a puck and asked to resist nine bars of water evenly, and it is the grinder that decides whether the particles are uniform enough for that to happen. A pump is a pump. The cheapest machine on this page and a $600 machine both reach brew pressure; what separates their output is almost entirely what went into the basket. Feed either one from a blade grinder and you get the same thing — a mixture of dust and boulders, with the dust over-extracting bitter and the boulders under-extracting sour in the same cup, and no shot adjustment that fixes it. Our burr vs blade grinder guide has the mechanism, and do you need a grinder for espresso answers the question most people on this budget are quietly hoping to avoid.

Why a hand grinder, not an electric. At this money a manual grinder is not a compromise, it is the correct answer. A hand grinder has no motor, no gearbox, no timer and no hopper assembly, so nearly the whole price goes into the burr set and the shaft that holds it steady. An electric at the same price has to buy all of that hardware first and the burrs get whatever is left — which is why no electric grinder in this band reaches espresso fineness with usable resolution. The trade is labor: a fine espresso dose is close to a minute of cranking, and it is real work. Hand vs electric grinders covers both sides, and best coffee grinders under $100 is the deeper ranking of the half of this budget that matters most.

What this budget cannot buy, stated plainly. No machine in this band has a PID, a pressure gauge, pre-infusion or a boiler with enough mass to pull two shots back to back without a wait. Every pump machine here ships with a pressurized dual-wall basket, which restricts flow at a fixed hole so that stale pre-ground coffee still produces foam — and which also makes your grind setting nearly irrelevant, defeating the grinder you just bought. Finding a single-wall 51mm basket is the first upgrade to make after this page; see 51mm portafilter accessories and pressurized vs unpressurized baskets.

And one thing to refuse. Do not buy a bean-to-cup super-automatic at this price, and do not buy a pod machine expecting espresso. The super-automatics that exist in this band grind, dose and tamp badly inside one sealed box you cannot improve, and a pod machine is a different drink made at a fixed recipe you do not control. Nespresso vs an espresso machine is fair to both, and semi-automatic vs super-automatic explains what the sealed box costs you.

The short answer

Quick picks

#ProductBest forScorePrice
01
CASABREWS CASABREWS 3700 Essential Espresso Machine
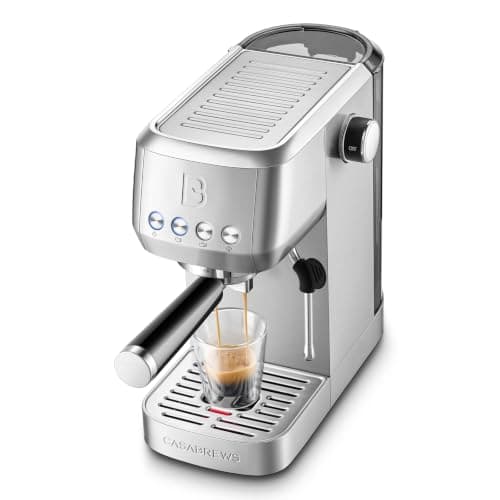
CASABREWS 3700 Essential Espresso Machine

The machine to build a $200 setup around, because it is the cheapest one here that both takes a 51mm portafilter and has a real steam wand rather than a plastic frothing aid. A 20-bar pump, an all-stainless exterior and a single small boiler: basic, but basic in the right places. The limits are honest and shared by everything at this price — the boiler makes you wait between pulling a shot and steaming milk, there is no temperature control of any kind, and it ships with a pressurized basket that you will want to replace. CASABREWS is also a newer brand whose long-term durability is simply less proven than De'Longhi's.

Best overall — the machine half of the budget
5.8
Check price →
02
TIMEMORE TIMEMORE Chestnut C3 ESP Manual Coffee Grinder
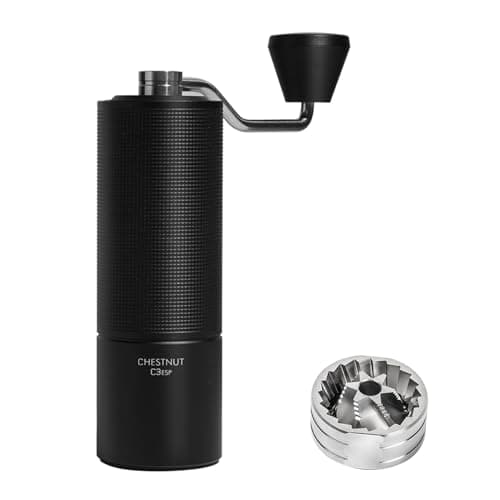
TIMEMORE Chestnut C3 ESP Manual Coffee Grinder

The grinder half of the budget, and the single most important purchase on this page. The C3 ESP is the espresso-geared version of Timemore's standard hand grinder: 38mm S2C stainless conical burrs in an all-metal body, with an external numbered dial at roughly 0.023mm per click and 30 clicks per rotation. That is finer resolution than most electric grinders at three times the money, and it is what lets you move the grind one click, watch the shot time shift a couple of seconds, and converge on a recipe instead of oscillating. The external dial matters more than it sounds: you can write down a setting for a bag of coffee and return to it exactly.

The grinder — and the half of this budget that decides how the coffee tastes
8.6
$68.00Amazon
03
Wacaco Wacaco Nanopresso
Wacaco Nanopresso

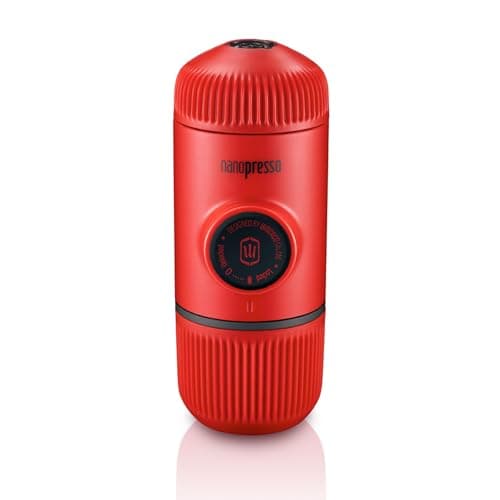
The budget route, and the one we would take. A patented spring-loaded hand pump reaches a peak of around 18 bar with no electricity, no battery and no cables, which means it hits real espresso pressure for a fraction of what the cheapest pump machine costs — and because it costs so much less, it leaves room in a $200 budget for the grinder plus the scale and WDT tool below. The limits are small and clearly stated: the stock basket is an eight-gram single, so this is one intense little espresso rather than a full double, and you supply the hot water and the fine grind yourself.

Budget pick — the cheapest route to a genuine 9-bar-plus shot
7.0
$51.92Amazon
04
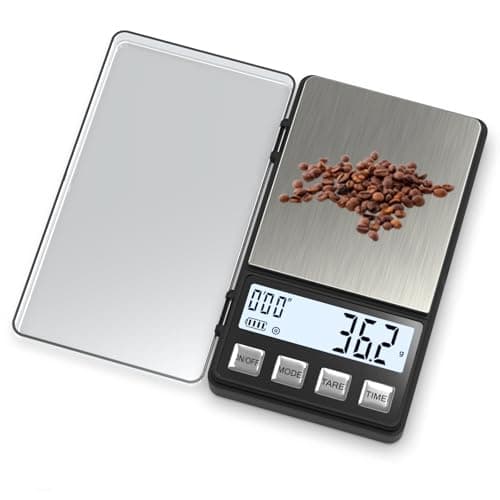
Weightman WEIGHTMAN Espresso Scale with Timer (1000g x 0.1g)
WEIGHTMAN Espresso Scale with Timer (1000g x 0.1g)

The cheapest item that turns a lucky shot into a recipe. It resolves to 0.1 g, has a built-in timer, and is small enough to sit under a portafilter on the drip tray — which is all a scale has to do. Without one you are dosing by eye and judging shots by how they look, and the two most useful numbers in espresso are the dose in and the weight out. With one, 'that tasted good' becomes '18 in, 36 out, 28 seconds' and you can repeat it tomorrow. On a $200 budget this is the best dollar-for-result purchase on the page after the grinder.

The cheapest part that makes a good shot repeatable
7.0
$13.99Amazon
05
MATOW MATOW Mini Stainless Steel WDT Tool
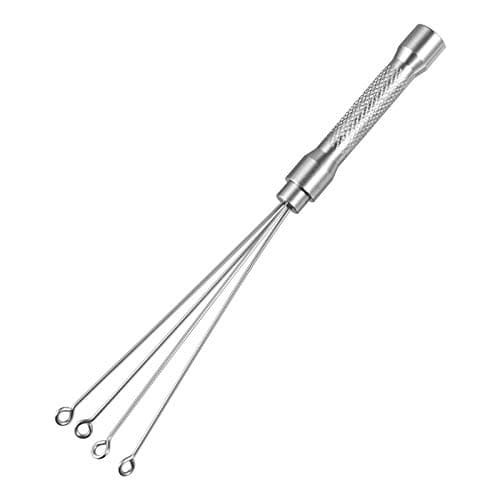
MATOW Mini Stainless Steel WDT Tool

The last few dollars of the budget, and the cheapest fix for the most common fault in this band. Ground coffee clumps as it leaves any grinder, and a clump is a dense spot the water routes around instead of through — which is channeling, and channeling is why a shot sprays, runs fast and tastes thin and sour at the same time. A WDT tool is a handle holding fine needles that you stir through the dry grounds to break those clumps before tamping. This one is a bare mini version with no stand, which is why it costs what it does and why it still works exactly as well.

The cheapest fix for channeling, and the last item this budget affords
6.8
$5.99Amazon

#ad · Live prices from the Amazon Product API, as of November 20, 2026. Where we have no verified live price, we show none — a gap beats a number that has rotted.

In detail

The picks, in full

01
CASABREWS CASABREWS 3700 Essential Espresso Machine

Best overall — the machine half of the budget

CASABREWS 3700 Essential Espresso Machine

20-bar pump51mm portafilterReal (basic) steam wandSingle small boiler, stainless body
5.8/10

The machine to build a $200 setup around, because it is the cheapest one here that both takes a 51mm portafilter and has a real steam wand rather than a plastic frothing aid. A 20-bar pump, an all-stainless exterior and a single small boiler: basic, but basic in the right places. The limits are honest and shared by everything at this price — the boiler makes you wait between pulling a shot and steaming milk, there is no temperature control of any kind, and it ships with a pressurized basket that you will want to replace. CASABREWS is also a newer brand whose long-term durability is simply less proven than De'Longhi's.

Value at this budget
9
Shot quality potential
5
Steam capability
5
Build
6
Upgrade path
4

Pros

  • The cheapest machine here that both takes a real portafilter and steams milk
  • All-stainless exterior looks a class above its cost
  • Leaves just enough of a $200 budget for a grinder that can grind for espresso
  • Simple enough that there is very little to go wrong

Cons

  • Ships with a pressurized dual-wall basket, which hides the grind you paid for
  • Small boiler: shot, then wait, then steam
  • No PID, no gauge, no pre-infusion
  • Newer brand with a shorter service record than the established names

Don't buy this if…

…you make milk drinks for two people every morning. The boiler recovery is the bottleneck and no technique shortens it. Save and buy a Breville Bambino instead, which is the machine our $500 setup page is built around.

The thing to understand about this machine is that it is a competent pump and boiler with nothing clever attached, and at this budget that is a feature. Everything that would make it better costs more than the whole machine does. What you can improve cheaply is the puck: a single-wall basket, an even distribution, and a grind you control. That is where the rest of this page goes.

The full ranking of machines at this money, without the kit framing, is on best espresso machines under $200, and our CASABREWS CM5418 review covers the brand's step-up model if the budget moves.

Check price on Amazon →

No buyable offer at the last price check (November 20, 2026). We show nothing rather than a stale number.

#ad · we may earn a commission from this link to CASABREWS 3700 Essential Espresso Machine

02
TIMEMORE TIMEMORE Chestnut C3 ESP Manual Coffee Grinder

The grinder — and the half of this budget that decides how the coffee tastes

TIMEMORE Chestnut C3 ESP Manual Coffee Grinder

38mm S2C stainless conical burrsExternal stepped dial, ~0.023mm per click30 clicks per rotationAll-metal body, espresso-capable
8.6/10

The grinder half of the budget, and the single most important purchase on this page. The C3 ESP is the espresso-geared version of Timemore's standard hand grinder: 38mm S2C stainless conical burrs in an all-metal body, with an external numbered dial at roughly 0.023mm per click and 30 clicks per rotation. That is finer resolution than most electric grinders at three times the money, and it is what lets you move the grind one click, watch the shot time shift a couple of seconds, and converge on a recipe instead of oscillating. The external dial matters more than it sounds: you can write down a setting for a bag of coffee and return to it exactly.

Espresso capability
8
Grind quality
8
Adjustment resolution
9
Build
8
Value
10

Pros

  • Reaches genuine espresso fineness, which no electric in this band reliably does
  • External numbered dial means a setting is repeatable and survives a wash
  • All-metal body with a supported shaft keeps the burrs aligned under load
  • Effectively zero retention, so a grind change lands on the very next dose
  • Grinds pour over and French press perfectly well — it is only geared toward fine

Cons

  • A fine espresso dose is close to a minute of cranking, and it is hard work
  • Stepped rather than stepless, so occasionally the setting you want sits between clicks
  • 25 g capacity means a large French press batch is two grinds
  • No electric convenience at all — there is no timer and no button

Don't buy this if…

…your household makes three or more espresso drinks every morning. The grind quality is not the problem, the labor is, and at that volume the grinder quietly stops getting used.

If you take one thing from this page, take this: a cheap machine fed by this grinder makes better espresso than an expensive machine fed by a blade grinder, and it is not a close contest. The reason is that the grinder is the only part of the chain that controls particle size, and particle size is what sets the resistance the pump pushes against.

Deeper reading: Timemore Chestnut C3 ESP review, and if the budget can stretch, the KINGrinder K6 has larger 48mm burrs and finer steps — see KINGrinder K6 vs Timemore C3.

$68.00View on Amazon

$99.0031% off

Price as of November 20, 2026. Prices change — Amazon's at checkout is the one that counts.

#ad · we may earn a commission from this link to TIMEMORE Chestnut C3 ESP Manual Coffee Grinder

03
Wacaco Wacaco Nanopresso

Budget pick — the cheapest route to a genuine 9-bar-plus shot

Wacaco Nanopresso

18-bar hand pump, no batteryGround coffee, 8 g dose80 ml tank, 336 gYou supply the hot water
7.0/10

The budget route, and the one we would take. A patented spring-loaded hand pump reaches a peak of around 18 bar with no electricity, no battery and no cables, which means it hits real espresso pressure for a fraction of what the cheapest pump machine costs — and because it costs so much less, it leaves room in a $200 budget for the grinder plus the scale and WDT tool below. The limits are small and clearly stated: the stock basket is an eight-gram single, so this is one intense little espresso rather than a full double, and you supply the hot water and the fine grind yourself.

Value at this budget
10
Shot quality potential
7
Steam capability
0
Build
8
Portability
10

Pros

  • Cheapest honest route into real espresso pressure by a wide margin
  • Leaves most of a $200 budget for the grinder and the small parts
  • Nothing to plug in, nothing to descale, nothing to wait for
  • Tiny — it lives in a drawer, a bag or a glovebox
  • No pressurized basket to work around; the pressure is yours to make

Cons

  • Eight-gram single basket, so it is one small intense shot rather than a double
  • No steam wand at all, so milk drinks mean a separate frother
  • You boil the water separately, which adds a step and a kettle to the counter
  • Hand pumping every shot is a physical routine, not a button

Don't buy this if…

…you want a machine on the counter that makes a cappuccino. The Nanopresso makes espresso and nothing else; milk is a separate purchase and a separate step.

The reason this sits third rather than first is honest: most people searching for an espresso setup want a machine on the counter with a steam wand, and the Nanopresso is not that. But on pure shot quality per dollar at this budget it beats the pump machine above, because the money it does not spend on a boiler and a chassis goes into your grinder instead. If milk is not part of your routine, buy this one.

See our full Nanopresso review and best portable espresso makers for the rest of the hand-pumped field. If you need milk on this budget, how to froth milk without a steam wand is the workaround.

$51.92View on Amazon

$64.9020% off

Price as of November 20, 2026. Prices change — Amazon's at checkout is the one that counts.

#ad · we may earn a commission from this link to Wacaco Nanopresso

04
Weightman WEIGHTMAN Espresso Scale with Timer (1000g x 0.1g)

The cheapest part that makes a good shot repeatable

WEIGHTMAN Espresso Scale with Timer (1000g x 0.1g)

0.1 g resolution, 1000 g capacityBuilt-in shot timerSmall enough for a drip trayBattery powered
7.0/10

The cheapest item that turns a lucky shot into a recipe. It resolves to 0.1 g, has a built-in timer, and is small enough to sit under a portafilter on the drip tray — which is all a scale has to do. Without one you are dosing by eye and judging shots by how they look, and the two most useful numbers in espresso are the dose in and the weight out. With one, 'that tasted good' becomes '18 in, 36 out, 28 seconds' and you can repeat it tomorrow. On a $200 budget this is the best dollar-for-result purchase on the page after the grinder.

Accuracy for the money
8
Response speed
5
Build
5
Value
10

Pros

  • 0.1 g resolution and a timer for a fraction of what espresso-branded scales cost
  • Turns a good accident into a repeatable recipe, which is the whole point of dialing in
  • Small footprint fits under most portafilters on the tray

Cons

  • Slower to settle than more expensive scales, so you read the final weight a beat late
  • No water resistance to speak of — keep it dry
  • Plastic build and a dim display

Don't buy this if…

…you want auto-tare and flow-rate readouts. Those are genuinely nice and they cost several times this. On this budget, resolution plus a timer is the whole requirement.

The full field, including the faster scales worth buying when the budget allows, is on best espresso scales. For how the numbers are actually used, how to dial in espresso and coffee-to-water ratio are the two pages to read next.

$13.99View on Amazon

Price as of November 20, 2026. Prices change — Amazon's at checkout is the one that counts.

#ad · we may earn a commission from this link to WEIGHTMAN Espresso Scale with Timer (1000g x 0.1g)

05
MATOW MATOW Mini Stainless Steel WDT Tool

The cheapest fix for channeling, and the last item this budget affords

MATOW Mini Stainless Steel WDT Tool

Fine stainless needlesMini format, no standWorks with 51mm, 54mm and 58mm basketsNothing to wear out
6.8/10

The last few dollars of the budget, and the cheapest fix for the most common fault in this band. Ground coffee clumps as it leaves any grinder, and a clump is a dense spot the water routes around instead of through — which is channeling, and channeling is why a shot sprays, runs fast and tastes thin and sour at the same time. A WDT tool is a handle holding fine needles that you stir through the dry grounds to break those clumps before tamping. This one is a bare mini version with no stand, which is why it costs what it does and why it still works exactly as well.

Effect on the shot
8
Build
5
Comfort
4
Value
10

Pros

  • Costs very little and removes the single most common cause of a bad shot at this price
  • Fits any basket diameter, so it survives a machine upgrade
  • No moving parts, no maintenance

Cons

  • No stand, so it rolls around the counter and the needles can bend if dropped
  • Needles are fine enough to need care when cleaning
  • Less comfortable to hold than the weighted-stand tools

Don't buy this if…

…you want a tool that lives upright on the counter and feels good in the hand. The weighted-stand versions are better objects and cost several times as much, which is money this budget does not have.

Why this and not a distribution tool: a spinning leveller flattens the top of the bed but does not reach the clumps underneath, and at this budget the clumps are the problem. Our best WDT tools page ranks the whole field, best distribution tools covers the other kind, and espresso puck prep is the routine the two tools belong to.

$5.99View on Amazon

$11.9950% off

Price as of November 20, 2026. Prices change — Amazon's at checkout is the one that counts.

#ad · we may earn a commission from this link to MATOW Mini Stainless Steel WDT Tool

Two routes, and how to choose between them. Route one is the counter machine: the CASABREWS plus the Timemore grinder, which takes essentially the whole budget and gives you a steam wand. Route two is the hand brewer: the Nanopresso plus the same grinder, which costs materially less and leaves room for the scale and the WDT tool, but makes a single eight-gram shot and no milk. If you drink milk drinks, take route one. If you drink espresso, take route two — it is the better coffee.

The order to buy in if you are spreading the cost. Grinder first, always. A grinder with no machine still makes excellent pour over, French press and AeroPress coffee while you save for the brewing half, so no money is idle. A machine with no grinder makes nothing worth drinking. After the grinder: the brewer, then a single-wall basket, then the scale, then the WDT tool.

What to upgrade first once the setup exists. On the pump-machine route the answer is the basket, not the machine — swapping the pressurized dual-wall basket for a single-wall one is the change that lets the grinder you bought actually matter. On the Nanopresso route the answer is a kettle you can control, because you are supplying the water temperature yourself.

When to skip this budget entirely. If you can wait and save, the next real step is not incremental. Our best espresso setup under $500 page buys a machine that heats in three seconds, steams milk properly, and still leaves room for a grinder, a precision basket, a calibrated tamper, a distribution tool and a scale. That is a different class of setup, not a nicer version of this one. If you already own a grinder, skip the pairing logic altogether and read best espresso machines without a grinder instead.

How we picked

We did not lab-test this gear

Everyone in this category says they tested twenty machines. We have not pulled shots on every product here, and we say so. What we did instead: compiled the published specifications, cross-checked the manufacturer manuals, computed the running cost (wattage to energy, grams-per-shot to cost-per-cup), weighed aggregated owner reports, and scored each product against a published rubric. The scores are judgments from documented research — not measurements we took, because we do not have a test lab and we will not pretend we do. Where hands-on time would tell you more than a spec sheet, we flag it. Where a number came from someone else's work, we name them in Sources.
Questions

Frequently asked

Can you get a decent espresso setup for under $200?
Yes, but only by accepting that the budget buys two things rather than six. The pairing we would buy is the CASABREWS 3700 Essential and a Timemore Chestnut C3 ESP hand grinder, which takes essentially the whole budget. If you do not need milk, the Wacaco Nanopresso plus the same grinder costs less, makes a better shot, and leaves room for a scale and a WDT tool. Live prices are in the table above.
Should I spend more on the machine or the grinder at this budget?
Split it roughly down the middle, and if you have to favor one, favor the grinder. Every pump machine in this band reaches brew pressure; what separates a good shot from a bad one is whether the coffee in the basket is uniform enough to resist that pressure evenly, and only the grinder controls that. See do you need a grinder for espresso.
Is a hand grinder good enough for espresso?
At this budget it is better than good enough — it is the only option that works. A hand grinder spends almost its whole price on the burr set and the shaft that holds it steady, because there is no motor or gearbox to pay for, so it reaches espresso fineness with resolution no electric in this band can match. The cost is labor: a fine espresso dose is close to a minute of cranking.
Why do I need to replace the basket on a cheap espresso machine?
Because the basket that comes in the box is usually pressurized. A pressurized dual-wall basket restricts flow at a single fixed hole rather than letting the coffee bed set the resistance, which means it produces foam from almost any coffee — and also means your grind setting barely changes the shot. A single-wall 51mm basket is inexpensive and is what makes the grinder worth owning. See pressurized vs unpressurized baskets.
Can I make lattes and cappuccinos with a setup at this price?
With the pump-machine route, yes, with patience — the boiler is small, so you pull the shot, wait for it to switch over, then steam. With the Nanopresso route there is no steam wand at all, so milk means a separate frother or the jar-and-microwave method in how to froth milk without a steam wand. Either way, how to steam milk is the technique page.
What should I add first when I have more money?
A single-wall basket for the machine, then a calibrated tamper, then a better grinder. The one thing not to do is replace the machine first — a new pump buys you very little at this end of the market, while every one of those three purchases changes what is in the cup.

Keep reading

Same gear, other pages

We cover this gear elsewhere too

Receipts

Sources

We do not run a testing lab, and we do not pretend to. Where a measured number came from someone else's work, we name them and link them. Where we could not verify something, we say so on the page rather than quietly leaving it out. Read our full method.